Testimonials
Services
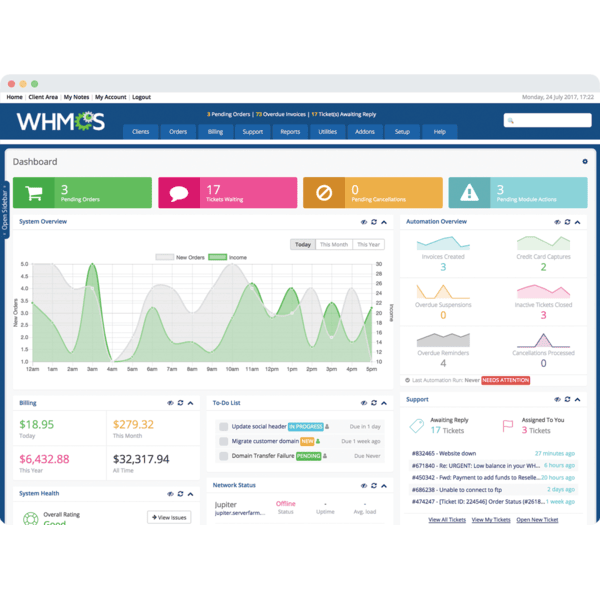
WHMCS + WHM Live Setup Guide & Server Advice


Frequently asked questions
What is domain registration and web hosting?
Domain registration is the process of booking a unique web address, such as yourbusiness.com, for a fixed period (usually one year) through a domain registrar. Web hosting is the server space where your website's files, images, and databases are stored so the site stays online. You need both — the domain acts as your address, the hosting is the land your website is built on, and the two are connected using DNS settings.
How to register a domain?
To register a domain, pick a short, brandable name, check its availability with a domain registrar, and add it to your cart. Choose an extension (.com and .in are the most common in India), enter your registrant contact details, complete the payment, and verify the confirmation email. It is also wise to enable WHOIS privacy protection so your personal contact details are not publicly visible.
How much does domain registration cost in India?
For domain registration in India, a .com domain typically costs around ₹700–₹1,200 per year, while a .in domain usually ranges between ₹300 and ₹900 per year. First-year promotional prices are often lower, but renewals happen at the standard rate, and premium or already-registered domains can cost significantly more. GST may apply to the final price depending on the registrar.
How to check domain registration details?
You can check domain registration details using a WHOIS lookup tool — enter the domain name and you will see the registrar, registration date, expiry date, and name servers. If the owner has enabled privacy protection, personal contact details will be hidden, but technical details like the registrar and domain status remain visible. Most registrars also let you check a domain directly from their search bar.
What is VPS hosting and how does it work?
VPS (Virtual Private Server) hosting is a type of hosting where one physical server is divided into multiple isolated virtual servers using virtualization software. Each VPS gets its own dedicated share of CPU, RAM, and storage, along with full root access, so your website is not affected by neighbours on the same machine. This makes it a middle ground between affordable shared hosting and expensive dedicated servers.
What is the full form of VPS hosting?
The full form of VPS hosting is Virtual Private Server hosting. "Virtual" refers to the server being created through virtualization software on a physical machine, "private" means resources like CPU and RAM are reserved only for you, and "server" is the machine that runs your website or application.
What is VPS hosting used for?
VPS hosting is commonly used for websites that have outgrown shared hosting, online stores, business applications, hosting control panels such as WHM or cPanel, billing systems like WHMCS, game and app servers, and development or testing environments. Since you get root access, you can install custom software and configure the server exactly the way your project needs.
What is the VPS hosting price in India?
The typical VPS hosting price in India starts around ₹400–₹800 per month for an entry-level plan with 1–2 vCPUs and 2–4 GB RAM, while mid-range plans with more resources usually fall between ₹1,000 and ₹2,500 per month. Fully managed VPS hosting in India costs more than unmanaged because the provider handles updates, security, and support. Prices also vary based on the data center location and the type of storage.
How do I choose between different VPS hosting plans?
When comparing VPS hosting plans, check the CPU and RAM your workload needs, whether storage is SSD or NVMe, monthly bandwidth limits, and how easily you can upgrade later. Also decide between unmanaged (cheaper, you maintain everything) and managed (costlier, the provider maintains the server), and pick a data center close to your audience — for Indian visitors, an India location improves loading speed. Reliable support and regular backups are equally important.
Is free VPS hosting worth it?
Free VPS hosting can be useful for learning, testing, or short-term experiments, but it is rarely suitable for a real business website. Free plans usually come with weak hardware, poor uptime, no proper support, and security risks, and the provider can discontinue the service at any time. For any serious project, a low-cost paid VPS with guaranteed resources and support is a much safer investment.
How to install WHMCS?
To install WHMCS, first purchase a license and make sure your hosting meets the system requirements. Upload the WHMCS files to a protected directory on your server, create a MySQL database, run the installation wizard in your browser, and enter your license key. After installation, set up the cron job, connect your payment gateway and domain registrar modules, and complete the basic company and email settings.
How to install WHMCS on cPanel?
Yes, WHMCS runs smoothly on cPanel hosting. Create a subdomain such as billing.yourdomain.com, upload the WHMCS zip file through File Manager and extract it, create a MySQL database and user in cPanel, then open the installation URL and follow the wizard with your license key. Make sure the required PHP version and ionCube Loader are available, and add the cron job from cPanel's Cron Jobs section once installation is complete.
What are the WHMCS requirements?
The main WHMCS requirements are a hosting account running a supported PHP version, a MySQL or MariaDB database, ionCube Loaders, and common PHP extensions like cURL and GD. You also need an SSL certificate so the billing system runs securely over HTTPS, permission to create cron jobs for automation, and a dedicated domain or subdomain for the installation. Always check the exact version requirements for the WHMCS release you plan to use.
How to complete the WHMCS cron job setup?
The WHMCS cron job setup is done from your hosting control panel: copy the exact cron command shown in your WHMCS admin area under Automation Status, then create a new cron job in cPanel or your server's crontab and paste the command there. Set it to run every 5 minutes or as recommended for your WHMCS version — this automation handles invoice generation, payment reminders, account suspensions, and the email queue. You can confirm it is working from the Automation Status page.
How to complete the WHMCS Stripe setup?
For the WHMCS Stripe setup, log in to your WHMCS admin, go to Payment Gateways, and select Stripe. Paste your publishable and secret API keys from your Stripe dashboard, enable the webhook endpoint so payment confirmations sync automatically, and save the settings. Since Stripe requires a secure connection, make sure your WHMCS installation runs on HTTPS, and then test the checkout with a transaction before going live.